Categories
Creativity Education Technology

Makerspaces in Schools

A Makerspace is “a place where people can come together to use, and learn to use materials as well as develop creative projects” (Makerspaces Australia, n.d.). Makerspaces can be anywhere, but are commonly found in public and school libraries. It is best if the space “can be used for a range of activities with changing and flexible educational goals and creative purposes” (Makerspaces Australia, n.d.). Makerspaces and the idea of the maker movement are underpinned by pedagogies that focus on the learner as constructing their own knowledge through doing – through making. Sylvia Martinez tells us that “knowledge is born out of experience” (2014). If we give students the opportunity to use these Makerspaces to create something, then they are delving more deeply into what they are learning, rather than just taking notes, or listening to a teacher talk.

The main pedagogical theory that underpins Makerspaces is constructionism. Jonan Davidson talks about how constructionism is similar to constructivism in that it describes how people construct knowledge, but Papert added to the theory by arguing that learners also need to “construct real-world inventions which can be shared with others” (2014). If we allow our learners to use Makerspaces to engage in constructionist theory, then we are also enabling them to engage with content creatively and critically.

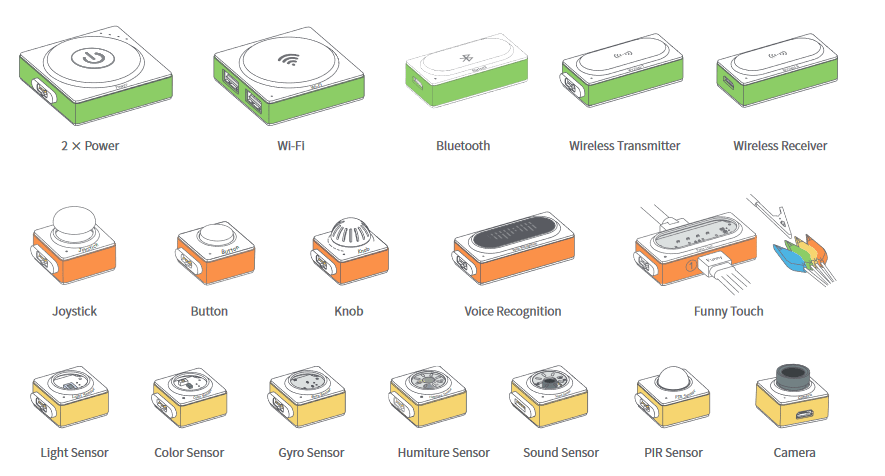
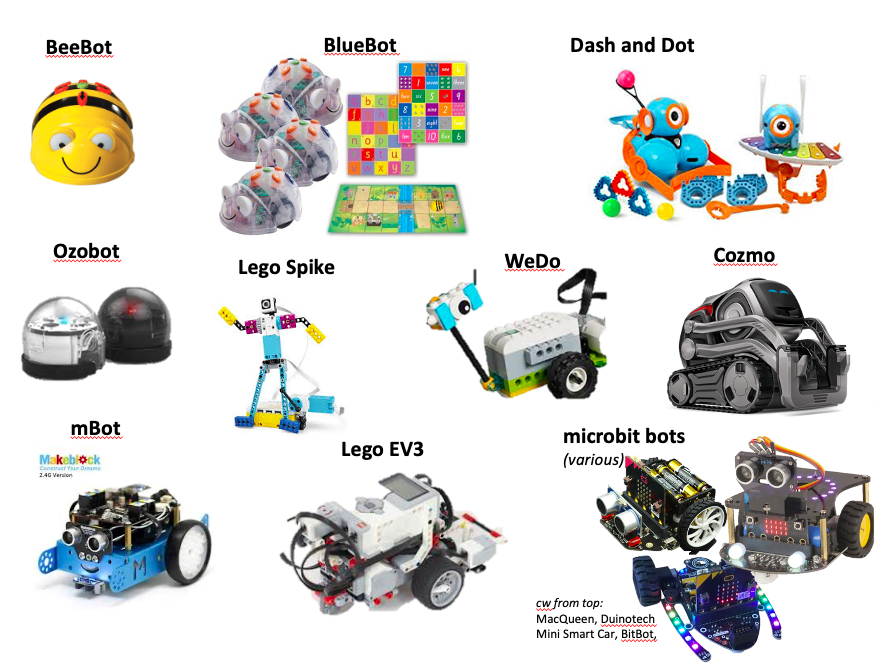
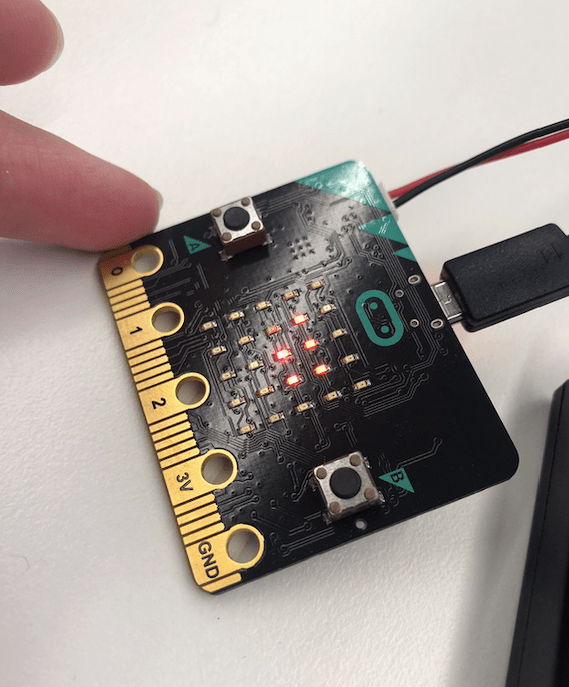
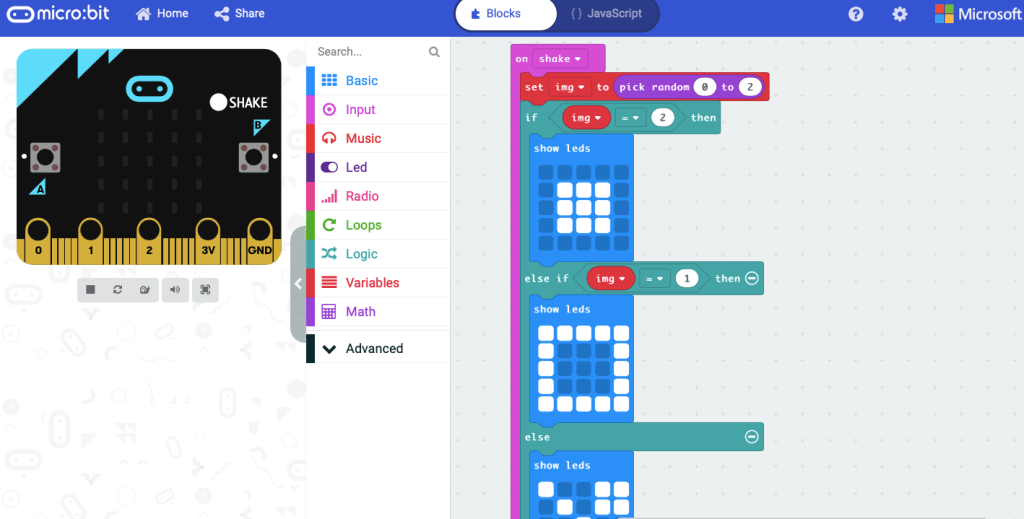
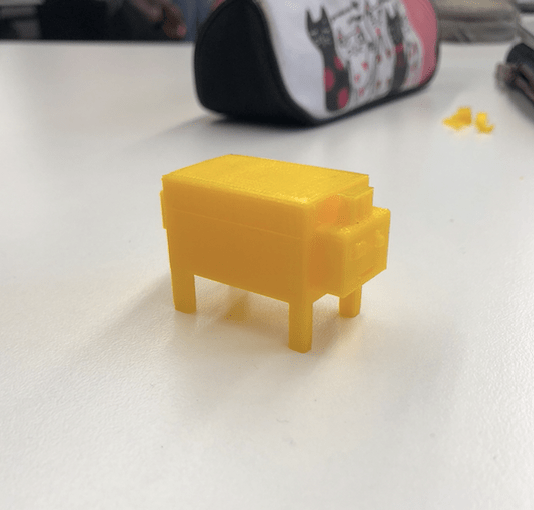
There are many different technologies out there that are appropriate for constructionist pedagogy and Makerspaces in particular. Today, I will be focusing on the Makeblock Neuron. The Neuron is a kit of programmable, magnetic blocks that have different inputs and outputs, resulting in a plethora of different functions and activities.

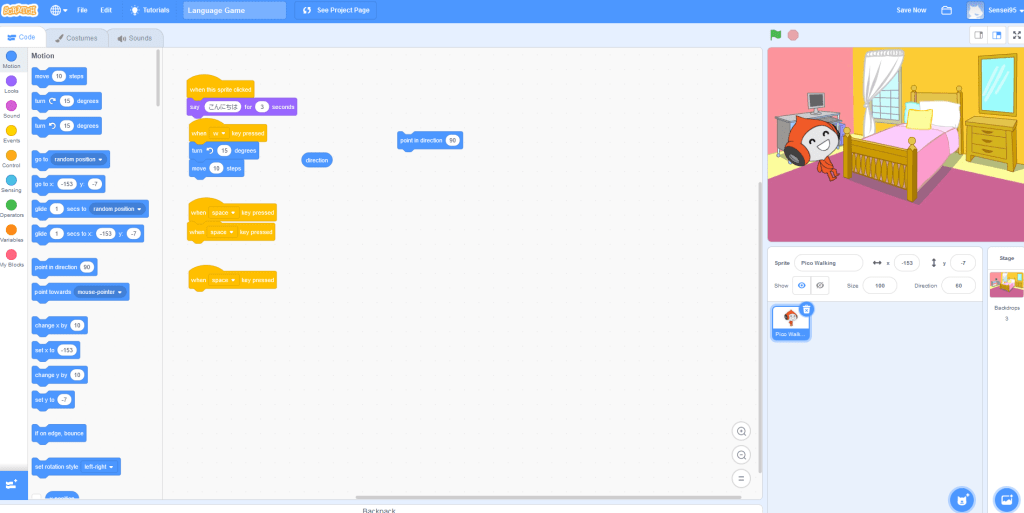
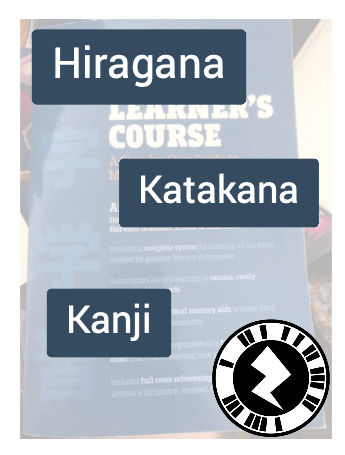
The Makeblock Neuron has uses in both primary and high school, and in all learning areas. The magnets and stability of the blocks make it good for younger students, while the programming aspects make it good for older students. Specifically for a languages/Japanese class, I would program the Neuron to respond to voice recognition with certain Japanese phrases, which would then be written in Japanese script on the display block, helping with vocabulary acquisition in the target language.

References:

Donaldson, J. (2014). The Maker Movement and the rebirth of Constructionism. Hybrid Pedagogy. Available at: https://hybridpedagogy.org/constructionism-reborn/

Makerspaces Australia. (n.d.). What is a Makerspace? Retrieved from http://makerspacesaustralia.weebly.com/what-is-a-makerspace.html

Martinez, S. (2014). Invent to learn: making, tinkering and engineering in the classroom [Video file]. Retrieved from https://www.youtube.com/watch?v=eDUHSPKvJRA

Categories
Creativity Education Technology

Game-based Learning and Creativity in the Classroom

The use of video games in the classroom is a controversial topic. Katie Salen mentions that when people think about video games, or see children playing them, that they see it as “a waste of time” (2010). But we know that video games – when carefully selected by the classroom teacher – can help students develop skills such as critical thinking, as well as problem -solving (Kangas, Koskinen & Krokfors, 2017). Not only that, but we also have research showing that game-based learning is beneficial to student learning (Mayer, 2019).

But what if we ask the students to make the game instead? Not only would we be helping them develop the aforementioned skills, but we would also be helping them to develop computational thinking skills and creative thinking skills. There are many technologies available currently to teachers and students that allow for activities that involve game creation and coding. One of the more popular and accessible technologies is Scratch. Scratch gives students the tools to create their own simple video games by using the Blockly coding language. Scratch is excellent for introducing coding to students as it is user friendly and can be translated into other coding languages (Python, JavaScript, C++ are just a few examples).

Students can choose the coding block from the list on the left and drag it to the blank space in the middle.

Prensky (2008) discusses how it is important to have students create educational games as they are the ones that will be playing them. It also gives students agency over their learning, and a product that they can show off at the end of their work. “With imagination and creativity any and every topic can be approached through some type of game” (Prensky, 2008). Coding and game creation can give students many creative options for different kinds of problems they might want to solve through a game.

One of the major issues though, with game creation, is the issue of accessibility. Not all students will have access to the technologies offered. Some students may have physical disabilities that prevent them from engaging in game-based learning and game creation. Some gaming companies are creating games that can help people access games and gaming. Somethin’ Else is a game developer that created ‘Papa Sangre‘, an audio only game that was created as intentionally blind-accessible.

I think that having students focus on these issues while creating their own games is a great way to include gaming, creativity and problem-solving in the classroom.

References:

Kangas, M., Koskinen, A., & Krokfors, L. (2017). A qualitative literature review of educational games in the classroom: The teacher’s pedagogical activities. Teachers and Teaching, 23(4), 451-470.

Mayer, R. E. (2019). Computer Games in Education. Annual Review of Psychology, 70, 531-549.

Prensky, M. (2008). Students as designers and creators of educational computer games: Who else? British Journal of Creative Technology, 39(6), 1004-1019.

Salen, K. (2010, July 29). Katie Salen on Learning with Games [Video file]. Retrieved from https://www.youtube.com/watch?v=xV_VlhV99EA

Categories
Creativity Education Technology

Virtual Reality in Education

Technology has advanced to the point where we can go from the world around us to a completely virtual world in a matter of seconds.
Milgram, Takemura, Utsumi and Kishino give us a visual representation of this in the form of their Reality-Virtuality Continuum (1994). The continuum shows where the real environment and the virtual environment meet in the middle to become mixed reality (MR).

https://www.researchgate.net/figure/Milgram-and-Kishinos-Mixed-Reality-on-the-Reality-Virtuality-Continuum-Milgram-and_fig1_321405854

This blog post will be focusing on virtual reality (VR) and its affordances in education. Southgate (2018) has outlined how immersive virtual reality (IVR) has both strengths and weaknesses when it comes to using the technology in classrooms. Firstly, it can increase motivation and engagement, increase student empathy, and teach students more about computational thinking. Some of the drawbacks of IVR in educational settings include privacy issues, OHS issues, child protection issues and issues with student access to content that may not be appropriate. Despite both the positive and negatives, we still do not have enough research on IVR in the classroom, and many educators still have a preference for augmented reality (AR). Dede (2009) mentions that lesser immersion experiences, like AR, can still enhance learning.

This week, we explored different ways of using VR. There were different videos and images of head mounted displays (HMDs), but most of them could be quite costly. The Google Cardboard is a cheap alternative that could be used easily in classrooms as long as students had mobile phones to insert into the goggles. Once again, the main issue with this would be health and safety issues. It is recommended that students sit down while using VR goggles so they don’t get injured or dizzy.

Teachers can make their own VR experiences for their students by using the Google Street View App.

When viewed with VR goggles, the above image is displayed as a 360 degree image. This can then be uploaded onto CoSpaces as an environment for students to create their own virtual world.

The use of CoSpaces allows for creativity to be brought into the use of VR technology in the classroom. Students become producers of VR worlds and technology rather than just consumers of pre-existing worlds and games.

References:

Dede, C. (2009). Immersive interfaces for engagement and learning. science, 323(5910), 66-69.

Milgram, P., Takemura, H., Utsumi, A., & Kishino, F. (1994). Augmented reality: A class of displays on the reality-virtuality continuum. Telemanipulator and Telepresence Technologies. 2351. 10.1117/12.197321.

Southgate, E. (2018). Immersive virtual reality, children and school education: A literature review for teachers. 

Categories
Creativity Education Review Technology

Augmented Reality in Education

Augmented Reality (AR for short) is a type of technology that allows “real and virtual objects to coexist in the same space and be interacted with in real time” (Bower, Howe, McCredie, Robison & Grover, 2014). Most people are familiar with AR games like Pokemon Go and Minecraft Earth, but there are lots of AR programs that are made and used for educational purposes. AR is becoming more popular in education today because it allows for more immersive experiences for both students and teachers, as well as increasing “learning achievement, motivation and attitude” (Akçayır, M., & Akçayır, G., 2017). It isn’t a technology that has much room for creativity unless it is being used with other technologies.

Some of these educational AR programs include:

Froggipedia.

Froggipedia is an app available on both iPhone and Android operating systems. It has a detailed description of the life cycle of a frog, and then has a section that allows to you dissect a frog. The dissection is quite accurate and gives students the opportunity to explore all the organs as well as pinning the frog down, and making incisions. The app is free and has a user-friendly interface. It would work best with the sciences KLA, specifically biology for high school students. The only drawback is that frogs are the only featured animal, but some classes dissect different animals and animal parts.

Ikea Place

Ikea Place is another app available on iPhone and Android operating systems. It is free and has an intuitive user-interface. The app allows you to go through the Ikea catalogue and place different furniture items in your room. Unlike Froggipedia, Ikea Place was not made to be specifically educational, but the app can definitely be used in the mathematics KLA when working on topics like space, shape and measurement. The main weaknesses in the app, lie with the fact that it was created for retail and consumer purposes, so it is limited in what can be done with it in the classroom.

For teachers that would rather make their own AR experiences for their classrooms, there is a website called ZapWorks. ZapWorks links with the Zappar app (available on both iOS and Android) to allow for full functionality of the AR experiences created on the website. Sites like ZapWorks show how AR technology can be used creatively as it has users creating their own AR experiences. I used ZapWorks to create an AR experience for the high school Languages KLA (Japanese).

I used one of my Japanese textbooks as the ‘trigger’ for my AR to start working. So if you have the AR code and hold the trigger up, it will automatically apply the AR to the trigger.

Here is my trigger with the AR code on the right.

Then, on the ZapWorks site, you can insert different things like video, images, and even buttons (displayed in the image on the left). All of these add-ons become AR on the trigger image or item you have used.

For this particular example, if you press on one of the buttons, it brings up a chart of hiragana, katakana or kanji (the three Japanese alphabets). There is also a ‘back’ button on each page so you can return to the home page and make a different selection.

As an educational tool, ZapWorks and by extension, AR technology, are great for implementing many different types of pedagogy as well as increasing student engagement and achievement. Yet there are some issues with AR that can make it difficult to work with. For example, when I was trying to use ZapWorks, it took me around thirty minutes to figure out how to go back to the ‘home page’ of my AR experience. My solution was to include ‘back’ buttons, but I am unsure if this is the most optimal way to go about it. Akçayır & Akçayır mention various challenges that include “Inadequate teacher ability to use the technology”, “technical problems” and “causes cognitive overload” (2017). I personally felt that these issues could definitely be an issue, especially if a teacher is pressed for time and resources.

Yet the benefits of AR are just as prominent and rewarding, and are outlined in many studies. AR supports different pedagogies like Constructivist learning (Bower, et al., 2014), which results in the promotion of “self-learning” and is a “student-centred technology” (Akçayır, M., & Akçayır, G., 2017).

References:

Akçayır, M., & Akçayır, G. (2017). Advantages and challenges associated with augmented reality for education: A systematic review of the literature. Educational Research Review, 20, 1-11.

Bower, M., Howe, C., McCredie, N., Robinson, A., & Grover, D. (2014). Augmented Reality in education – Cases, places and potentials. Educational Media International, 51(1), 1-15. Retrieved from https://www-tandfonline-com.simsrad.net.ocs.mq.edu.au/doi/pdf/10.1080/09523987.2014.889400?needAccess=true&

Categories
Creativity Education Technology

Robotics

This week, we looked at how robotics can be used to foster creativity in education. We looked at a range of different robots that could be used in all different kinds of education settings, all the way from primary school to high school.

The various robots that we looked at during the tutorial.

My group decided to focus on the Lego WeDo as we found we could apply it to both upper primary and lower high school (we all taught different age groups).

The Lego WeDo is a robot that comes in a kit comprised of 280 (version 2.0) different kinds of Lego bricks that can be attached to the ‘Smart Hub’, which is where all of the sound and motion sensors are. The Lego WeDo 2.0 core set is advertised as $319.95 AUD, which is quite expensive for such a small robot. If the WeDo is being bought in bulk for schools and other educational organisations, it can be bought in a 3 for 4 pack that costs $959.85 AUD (Modern Teaching Aids).

Despite the hefty costs, I believe that the Lego WeDo is an excellent tool for fostering creativity in the classroom. Lego WeDo uses both an online app (available on PC and tablet) and the physical bricks and motor for the robot. Obviously, creativity is fostered in a classroom when children are given the opportunity to use things like Lego to create anything tangible, but the addition of the WeDo app allows students to design and code their own robots too. So not only could students make a car out of the Lego WeDo, for example, but they could also program that car to move around in a certain way.

Robotics products like the Lego WeDo are a great example of how technology in education can move away from the idea of ““traditional” black-box technologies (technology that is ready-made for human use) to the design of transparent (white-box) digital artifacts where users can construct and deconstruct objects and have a deep structural access to the artifacts themselves” (Alimisis, 2012). This is the idea that students are no longer being given robots to play with, but they are being given ideas or problems to solve, and creating their own solutions with robotics and technology.

The main pedagogical ideology that robotics falls under is constructivism and constructionism. Constructivism is the idea that knowledge is not transferred from person to person, but constructed by the person’s current knowledge and previous experiences. Jung & Won (2018) discuss this in their article. “a constructivism framework presented their robotics education programs and curricula as providing young children with experiential opportunities to be active knowledge-constructors”. Essentially, giving students a product like Lego WeDo promotes creativity through constructivist pedagogies because children are learning from experience.

I can see myself using the Lego WeDo in a stage 4 English class by having students build the WeDo in the shape of a human (as a character from the target text) and programming in behaviours that reflect the character with the WeDo app.

References:
Alimisis, Dimitris (2012). Robotics in Education & Education in Robotics: Shifting Focus from Technology to Pedagogy. Robotics in Education Conference, 2012. Retrieved from: https://pdfs.semanticscholar.org/be99/1d6cface636a180fa394ee621c2bb09df1e7.pdf

Jung, S., & Won, E. S. (2018). Systematic review of research trends in robotics education for young children. Sustainability, 10(4), 905. 
Retrieved from: https://www.mdpi.com/2071-1050/10/4/905/pdf

https://www.teaching.com.au/catalogue/mta/mta-wedo-2-robotics

Categories
Creativity Education Review Technology

Computational Thinking

Computational thinking has many different definitions. According to Jeannette Wing, “computational thinking builds on the power and limits of computing processes, whether they are executed by a human or by a machine” (2006). The Australian Curriculum defines computational thinking as “a problem solving method that involves various techniques and strategies that can be implemented by digital systems… organising data logically, breaking down problems into parts, defining abstract concepts and designing and using algorithms, patterns and models” (2015). From these definitions, we can determine that computational thinking is the idea that it is a process of thinking (by either human or machine) that allows for problem-solving and decision-making to be simplified.

Currently, computational thinking only features in one curriculum area in the Australian Curriculum – Technologies. Technologies is mandatory in stage 4, and optional in stages 5 and 6. The issue with this is that computational thinking can be applied to every KLA in the Australian Curriculum. This week, I explored some different technologies that make computational thinking more of an option in my KLAs (English and LOTE).

The first technology that I played with was Blockly Games: Maze. This game was a great way for me to get into the mindset of computational thinking. I realised that using computational thinking is not just something you can ‘switch on’ when you’re new to it. You need to train your brain and teach yourself at first.

Blockly Games: Maze tells you how much JavaScript you use to solve each puzzle.

The second technology I used was Microbit. Microbit requires a small piece of technology that you plug into your computer.

You then use the online Microbit website to program the physical Microbit to do different things.

I would love to use the Microbit in my LOTE (Japanese) classroom to help my students learn the hiragana and katakana characters. An example activity could be getting them to program the Microbit to cycle through the characters with the LED lights when they press the A and B buttons.

I believe that computational thinking is an extremely important skill for all people to learn and have. I also feel that it can be used in every KLA in some way.

References:

ACARA (2015). Glossary. The Australian Curriculum. Retrieved from https://www.australiancurriculum.edu.au/f-10-curriculum/technologies/glossary/?letter=C

Wing, J. M. (2006). Computational thinking. Communications of the ACM49(3), 33-35.

Categories
Creativity Education Review Technology

Sketchup as a Creative Classroom Tool

This week, we looked at the concept of design-based thinking. Design-based thinking focuses on being able to think about an issue or problem with skills that underpin design (Bower, 2020). When thinking about these particular skills, I like to use a design thinking process. There are multiple ways that the design thinking process can be organised, so here is just one visual example of the design thinking process:

The five phases of the design thinking process
(Stevens, 2019)

Stevens’ visual example is not the only way to map out the design thinking process, but it is a starting point. Some other words for the five phases are as follows…

Empathise: Identify, determine, establish, figure out, see, what is the problem or issue?
Define: Explore, think about, search, how do we define or interpret the problem or issue?
Ideate: Create, explore, think, idea/s, talk, brainstorm
Prototype: Decide, experiment, make it tangible, propose
Test: Practice, results, feedback, reflect, try it out

Another important point to make is that the design thinking process is rarely ever linear and rarely has an end point. Things can always be reflected upon and improved. As we can see from Stevens’ image, the arrows go down a linear path, but they also bounce around, go backwards, and skip steps, which is perfectly normal.

So keeping the design thinking process in mind, I went to Sketchup to create my own 3D printable object. I really enjoyed using Sketchup in class with the guidance from David (our tutor), and was excited to work on my own creation at home. Yet I found that whatever I could think of making almost always ended in disaster…

My first attempt at making a dome.

I looked up tutorials on youtube and guides in blogs, but to no avail. In the end, I thought to myself, why not use the skills I already have (what I learned in class) and apply that to create something new, instead of trying to learn a whole new website in one night.
This would mean that my creation would need to be made entirely of squares, rectangle and cubes. It would also need to follow the rule that it needs to be printed in a 3D printer (so no ‘bits’ hanging off the edges). I came up with this:

This is ‘Usan’. It is a rabbit that I created in Sketchup with my limited knowledge and a few extra video tutorials. He was sent to be 3D printed last Monday night and I won’t get the results until the coming Monday, but I will post an update of the printed version of Usan.

The 3D printed Usan!

I believe that Sketchup is a tool that could be used in almost any classroom to foster creativity and critical thinking in students. My one issue though, is that it has a relatively high learning curve, and students will need to be shown how to use and navigate it step- by-step. This can only be an issue if time is limited and the teacher does not have much contact with students during the week, as they may forget what they have learned about the application. But it does help students to think about spatial awareness, dimensions and measurements, which are all valuable skills to have.


References:

Bower, M. (2020). EDUC3620 Digital Creativity and Learning. Lecture 1, week 3: Design Based Thinking [Lecture PowerPoint slides]. Retrieved from https://echo360.org.au/lesson/G_6807d407-48ee-45a6-a85b-afa72e3c41ec_ce39b546-11bf-4ac9-a583-d0c52bf755a7_2020-03-09T11:03:00.000_2020-03-09T11:57:00.000/classroom#sortDirection=desc

Stevens, E. (2019, December 16). What is Design Thinking? [Blog post]. Retrieved from https://careerfoundry.com/en/blog/ux-design/what-is-design-thinking-everything-you-need-to-know-to-get-started/

Categories
Creativity Education Technology

Online Communities

Technology has made communication in the 21st century easy and convenient. This includes communication between family, friends and professionals. But it benefits teachers and students in school settings greatly as well.

Padlet is a web browser-based tool for cooperative learning. It is perfect for fostering creativity in the form of an online community as it allows multiple people to work on one page together (similar to Google docs). The difference with Padlet is that you can pick multiple formats and different options when setting up your padlet.

When you first make an account on Padlet, this is the page you are greeted with. It gives options to make your own padlet, join someone else’s padlet, or look at other people’s public padlets for ideas.
When you click on ‘make a padlet’, in the top left-hand corner, you are given eight different options for the style and formatting of your padlet. The ‘wall’ style padlet is excellent for a brain-dump of information that can be sorted later. The ‘canvas’ option is excellent for brainstorms. While the ‘backchannel’ option is great for an online discussion.

Wheeler, Waite and Bromfield discuss that it is possible for all children to become critical and creative thinkers, as long as “conditions are conducive and children have acquired the relevant skills and knowledge” (2002). I believe that Padlet makes this possible as it is user-friendly with how intuitive it is to utilise. Its simple layout means that it is easy for a teacher to model to students how to use, and it has many editing features that allow for it to be an experience for students to figure out how to use it in different creative ways. “No one likes software that makes simplistic assumptions about what we mean or are trying to do” (McCormack & D’Inverno, 2013), which is exactly what Padlet doesn’t do. It’s simple enough to be able to navigate without becoming frustrated, but also complex enough that users don’t feel confined to one format. The beautiful thing about Padlet is that students can also choose to post their notes anonymously or with an author name, so students who may not feel comfortable sharing their ideas can still be recognised and a part of the learning environment. This is relevant to the idea that we should be “providing opportunities for ALL children to succeed… (it) is the key to maximising individual strengths and abilities” (Wheeler, et al., 2002). I emphasise ‘all’ children because technology gives teachers the opportunity to facilitate and encourage creativity with students of all backgrounds and opportunities without forcing them into uncomfortable situations.

Here are some of the creative formatting options available when you are first setting up your padlet.

Making a post to padlet is as simple as pressing a giant pink ‘+’ sign and typing in this box. At the bottom, we can see options to upload from files on the computer, link websites, or take a photo.

Here is the final product of my padlet.

Padlet is a user-friendly digital cooperative learning tool for learning both inside and outside of the classroom. It has various formats and uses that are fully customisable and is simple enough to use and understand for many schools and teachers who may be unsure about implementing technology as a tool for fostering creativity in the classroom.

REFERENCES:

McCormack, J., & D’Inverno, M. (2013). Computers and Creativity: The Road Ahead. Berlin: Springer-Verlag Berlin Heidelberg.

Wheeler, S. ; Waite, S.J. ; Bromfield, C. (2002). Promoting creative thinking through the use of ICT. Journal of Computer Assisted Learning, 18(3). 367-378. DOI:  10.1046/j.0266-4909.2002.00247.x

Design a site like this with WordPress.com
Get started